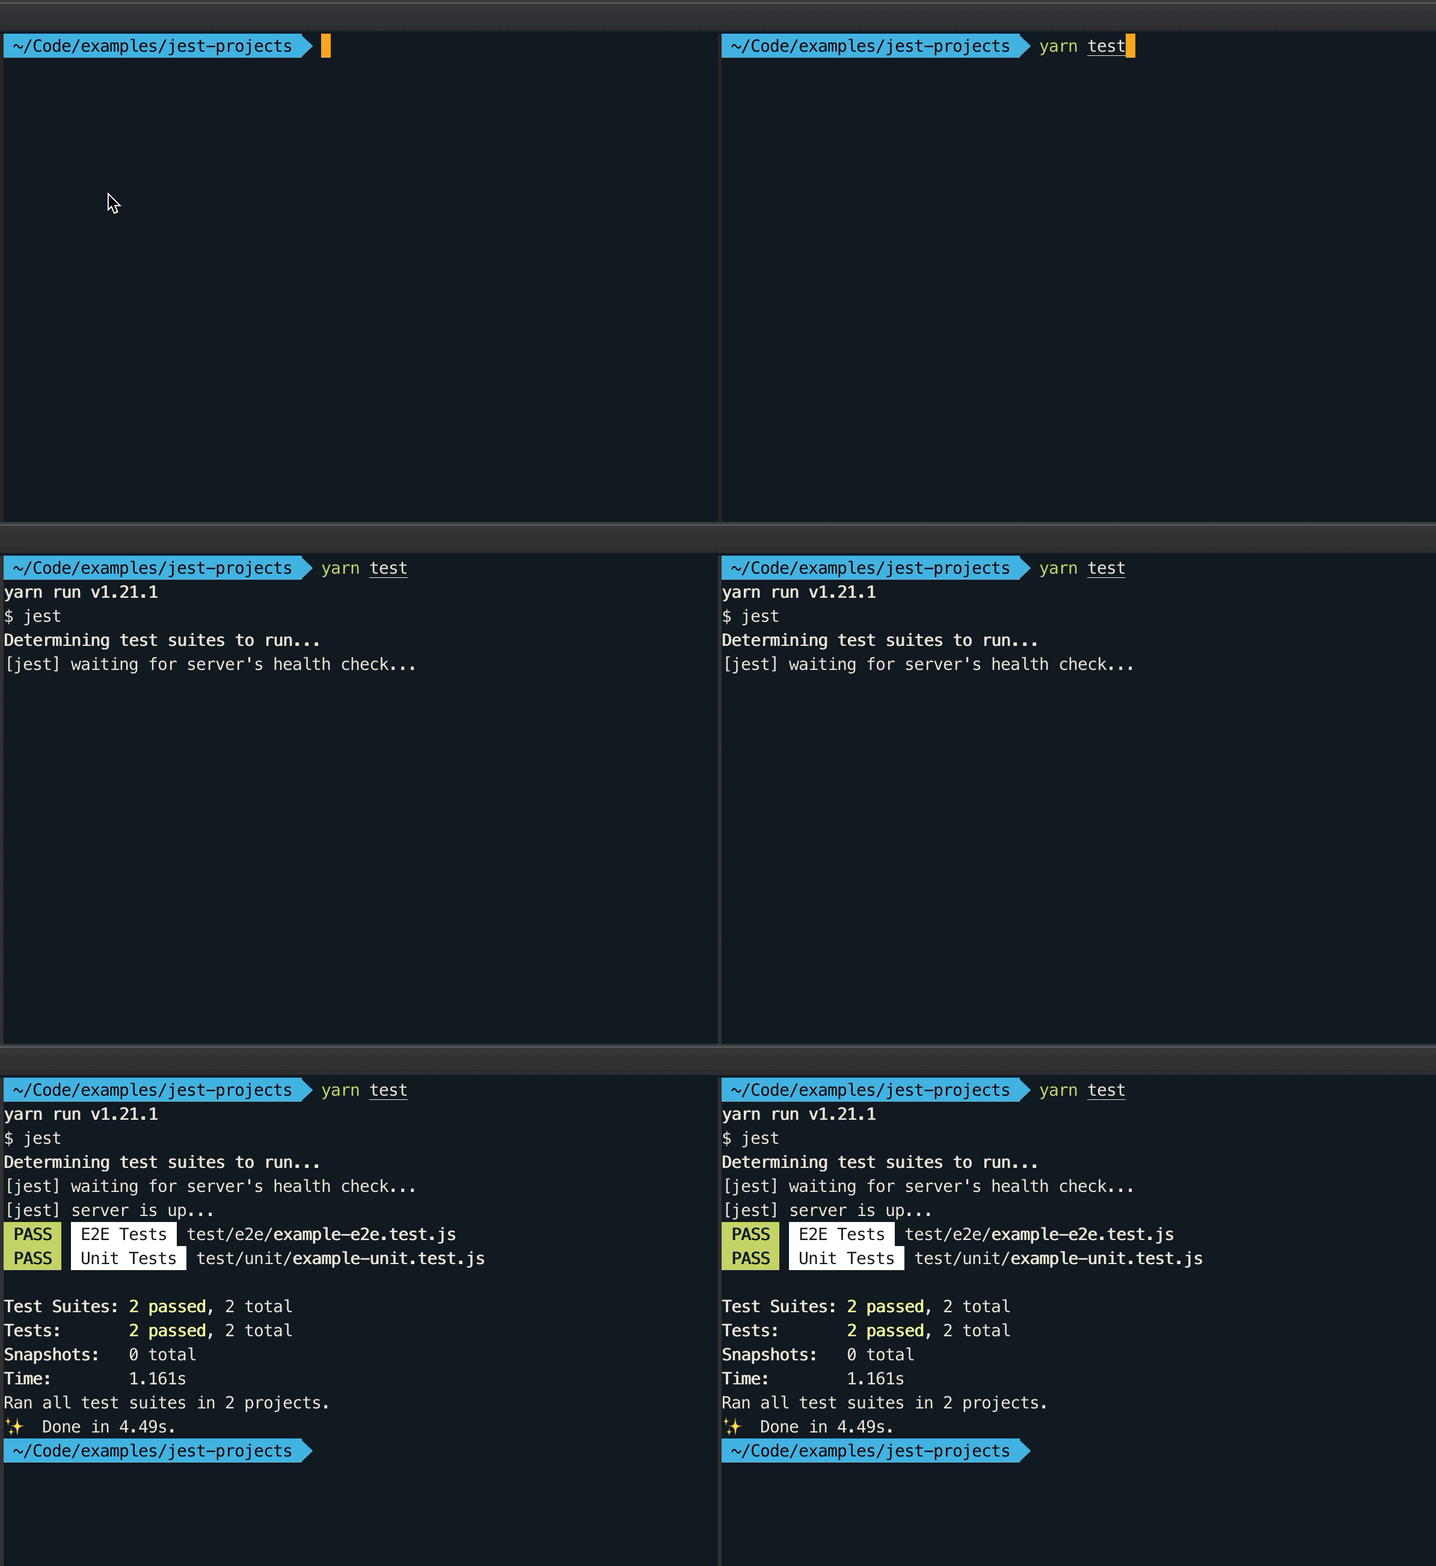
Running tests with jest is a pretty smooth experience right out the box. You can have different commands for unit and integration or end-to-end tests, and then a command to run all of them at once whenever needed.
The problem
Imagine that you want to setup jest to run two test suites; unit and end-to-end tests. In a realistic scenario, the unit tests don’t usually require any setup or teardown, and hardly need any tinkering to get testing straight away.
With e2e tests however, the opposite is true. You might want to have a health check running in the e2e suite to ensure that the app has finished building. There might be a global setup for routes, env variables and so on, things that are not at all required for the unit test suite.
Jest projects to rescue!
Thankfully, there is a pretty simple solution to all this, a feature of jest briefly described here.
The projects feature can also be used to run multiple configurations or multiple runners.
This is perfect. However, the configuration portion of the jest documentation is a little scarce. I found a way to solve the problem described in the section above.
To sum up: we’ll set up two independent test suites, unit tests with no setup/teardown, end-to-end tests with a setup, env config and more!

~root/jest.config.js
The first config is the main config located in the root folder. This file just describes where the individual test suite configurations are located.
module.exports = {
  projects: [
    '<rootDir>/test/*'
  ]
};
~root/test/unit/jest.config.js
The second config file describes how the unit tests going to be executed.
module.exports = {
  name: 'unit',
  displayName: 'Unit Tests',

  // A list of paths to directories that
  // Jest should use to search for files in
  roots: [
    '<rootDir>'
  ],

  // ...and your other env options,
  // such as test environment, coverage, etc
};namedescribes what the project name isdisplayNameis a visual indetifier to which test suite is running. This will be ouputted in your terminal
~root/test/e2e/jest.config.js
Last but not least, this is the last configuration file we need to setup for jest.
const path = require('path');

module.exports = {
  name: 'e2e',
  displayName: 'E2E Tests',

  // A list of paths to directories that
  // Jest should use to search for files in
  roots: [
    '<rootDir>'
  ],

  globalSetup: path.join(__dirname, 'jest.setup.js'),

  // ...and your other env options,
  // such as test environment, coverage, etc
};globalSetupallows us to configure a setup file that will run prior to this test suite
~root/test/e2e/jest.setup.js
This file will help us to indetify whether our API server is up and running. This is very useful if you’re running the tests in watch mode, or have hot reload setup in development.
const axios = require('axios');

const statusCheck = async () => {
  try {
    const res = await axios
      .get('http://localhost:8080/status');
    return res.status === 200;
  } catch (err) {
    return false;
  }
};

module.exports = async () => {
  console.log(`\n[jest] waiting for server to be up`);

  let isUp = false;
  while (isUp === false) {
    await new Promise((r) => setTimeout(r, 250));

    isUp = await statusCheck();
  }

  console.log(`[jest] server is up...`);
};
This file will try to do a GET request on http://localhost:8080/status and will retry until a 200 OK is returned. This route is rather simple to declare, and I’ve included a link to a repository that demos this functionality at the bottom of this article.
package.json
We’re almost done! Now we need to add the two project configs into our package.json file.
{
  "scripts": {
    "test:unit": "jest --projects test/unit",
    "test:e2e": "jest --projects test/e2e",
    "test": "jest"
  }
}
npm run test:unitwill only run unit testsnpm run test:e2ewill only run e2e tests with the global setup file included only for this suitenpm run testor justnpm twill run both suites
Example repo
I’ve included an example repository here that includes the same things as discussed in this article.
Thanks for reading!